By following the steps below, you can learn how to translate the product name and its details.
Video Guide :
Follow the steps shown in the video to learn how to use this feature within our app.
Please note that our app’s product translation feature is integrated with Shopify’s ‘Translate & Adapt‘ application.
Visual Guide :
If you have any questions about the video walkthrough, please follow all the steps in the visual tutorial we have prepared for you on how to use this feature within the app.
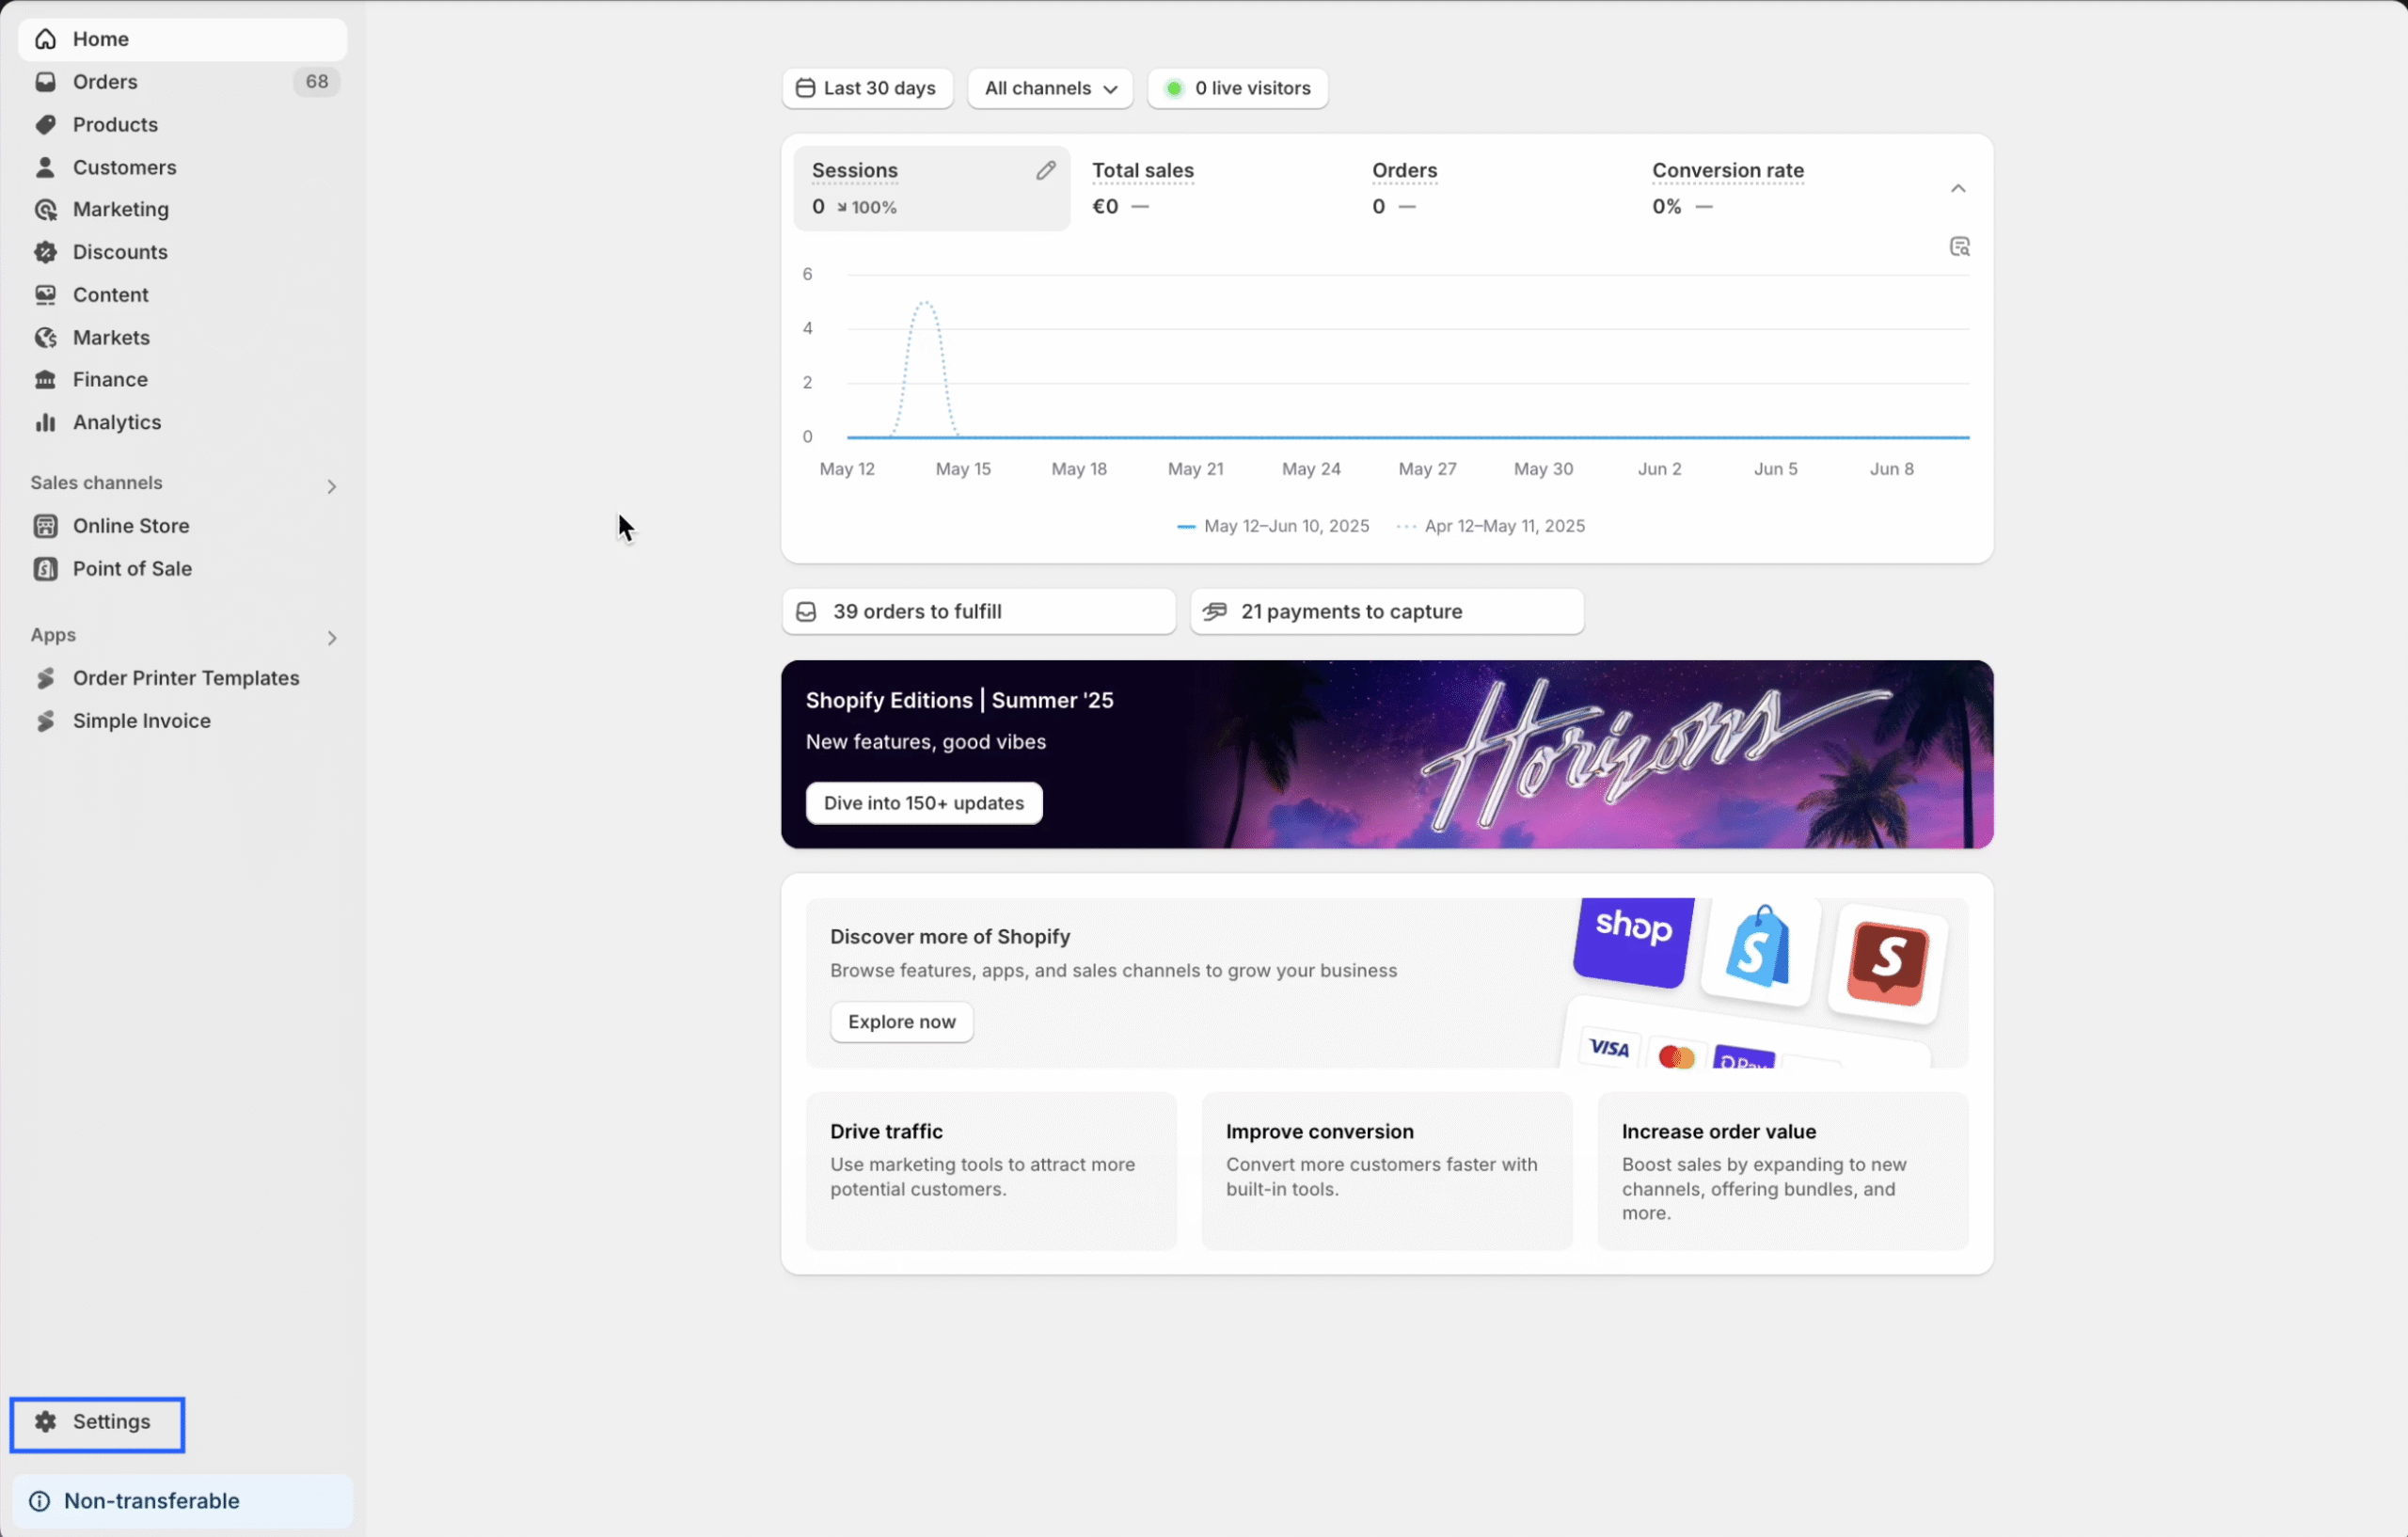
Step 1: Click on the Settings option in the Shopify admin panel.
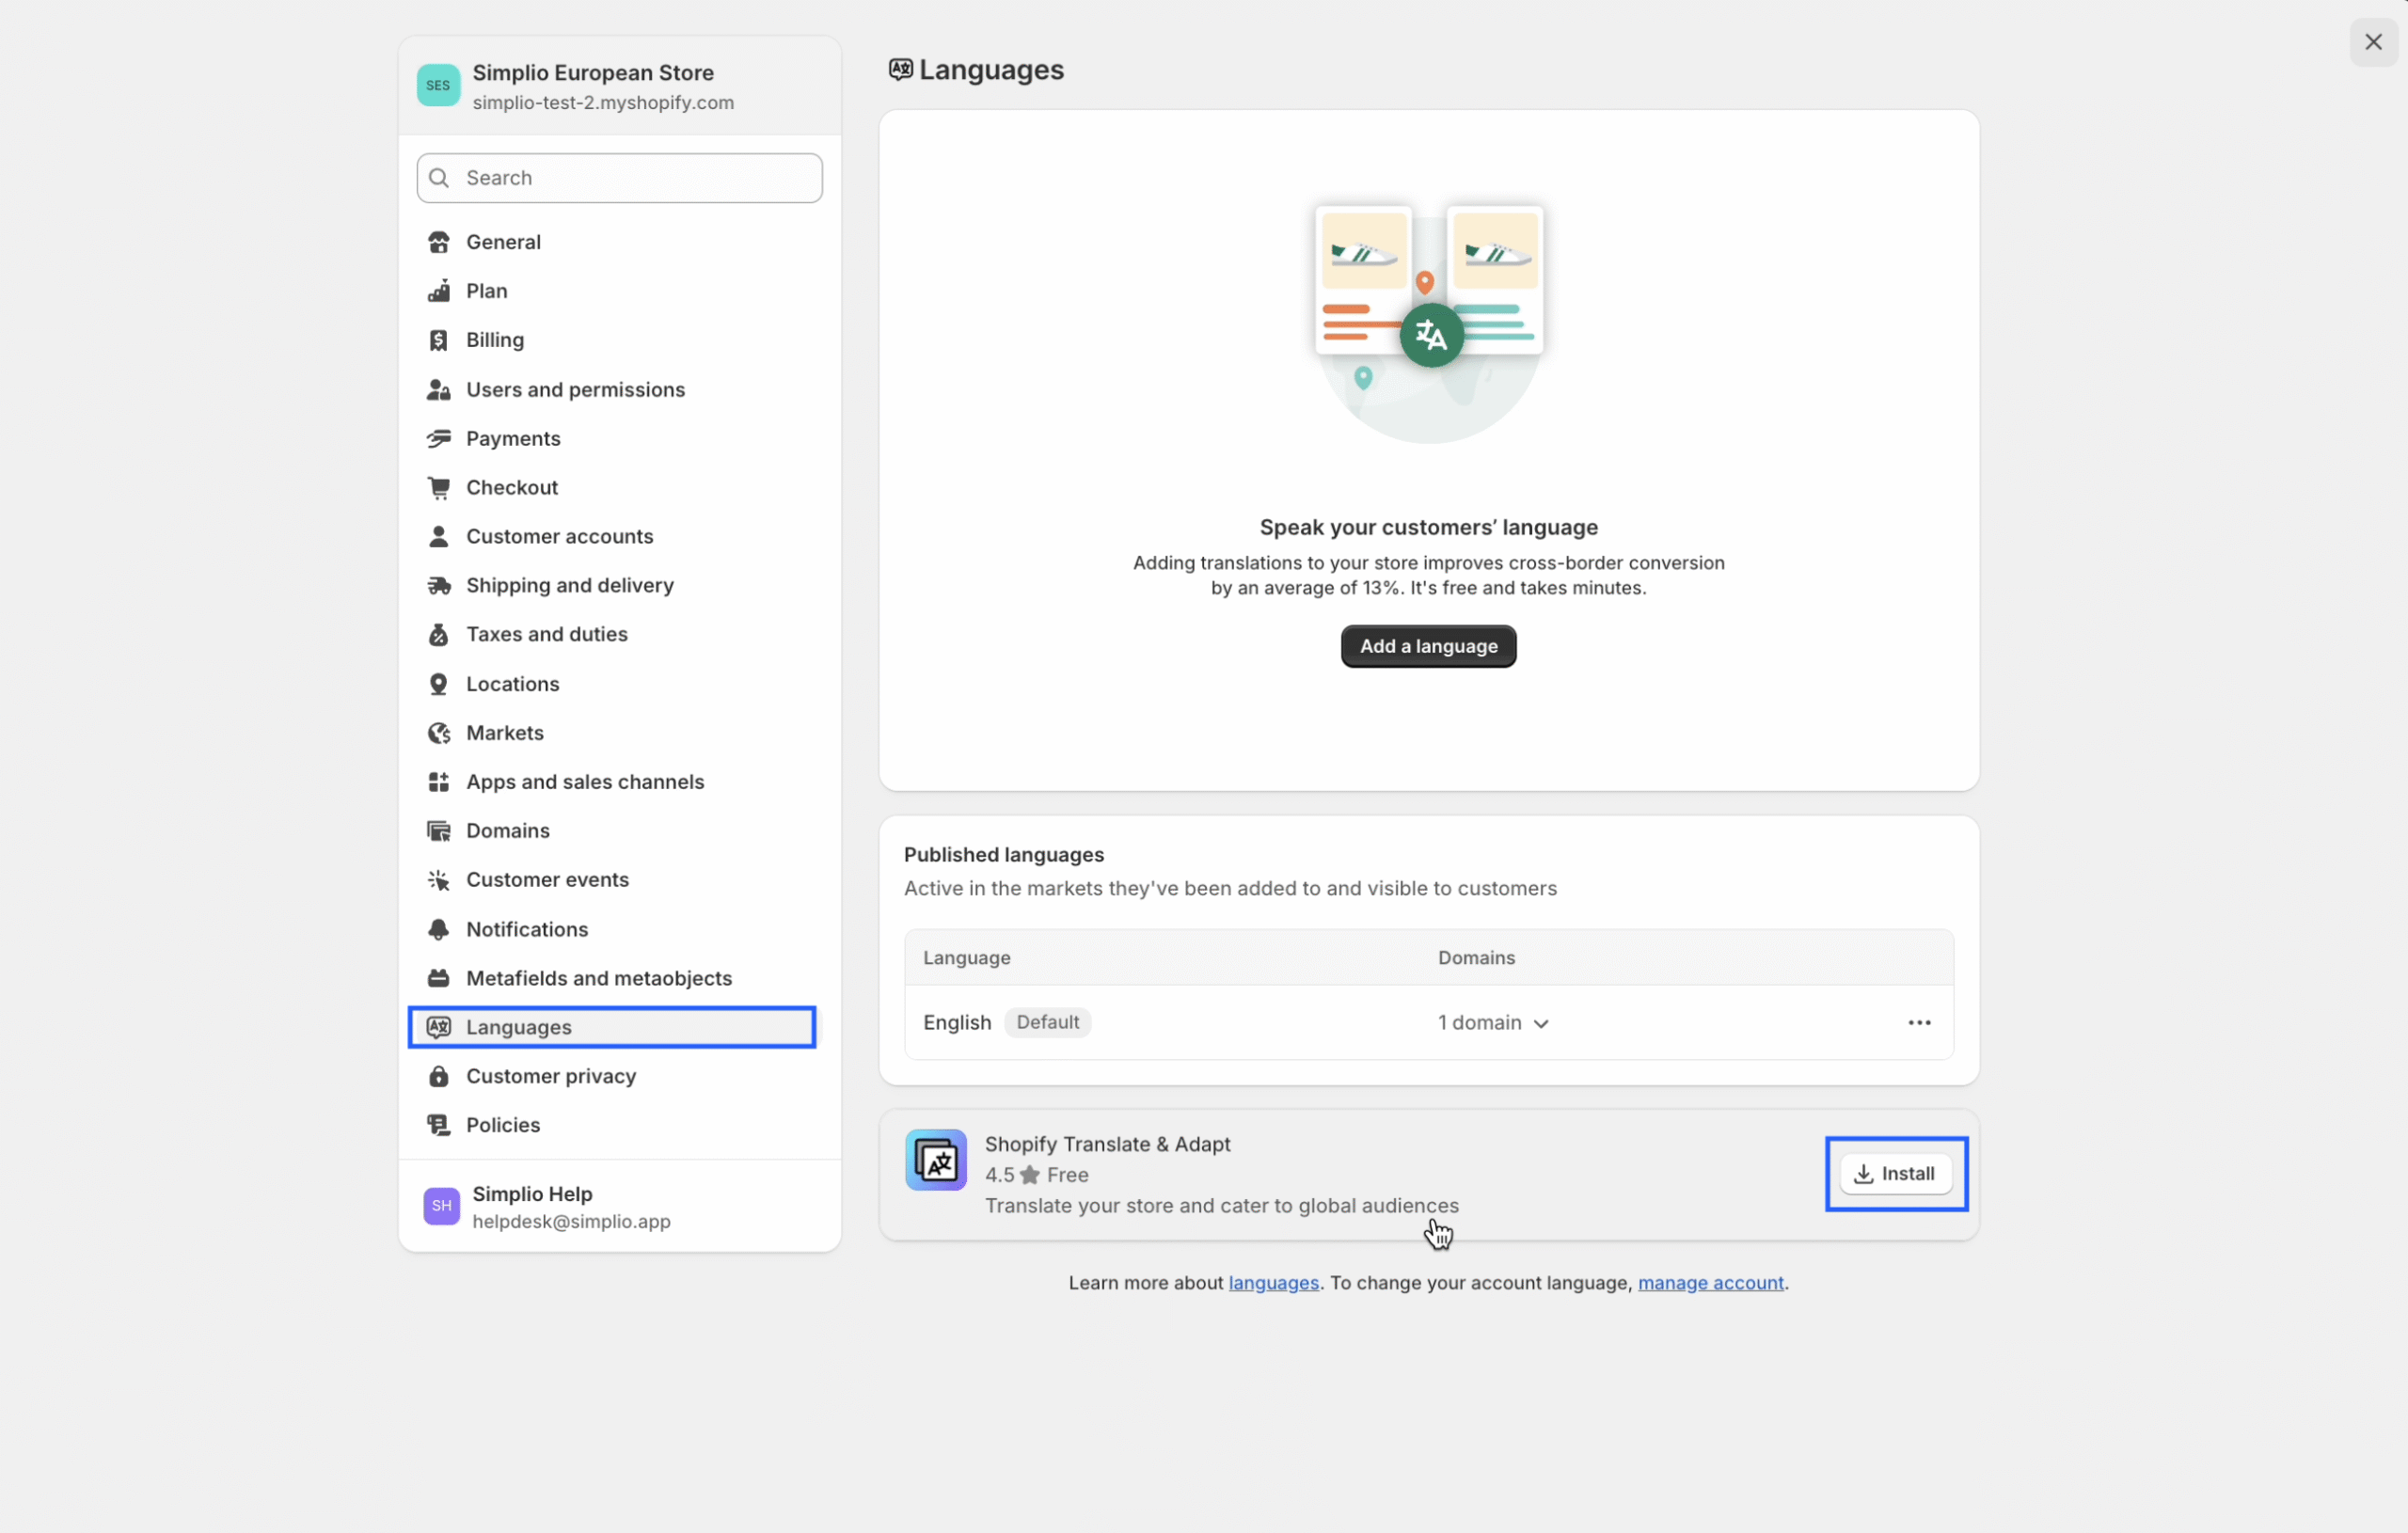
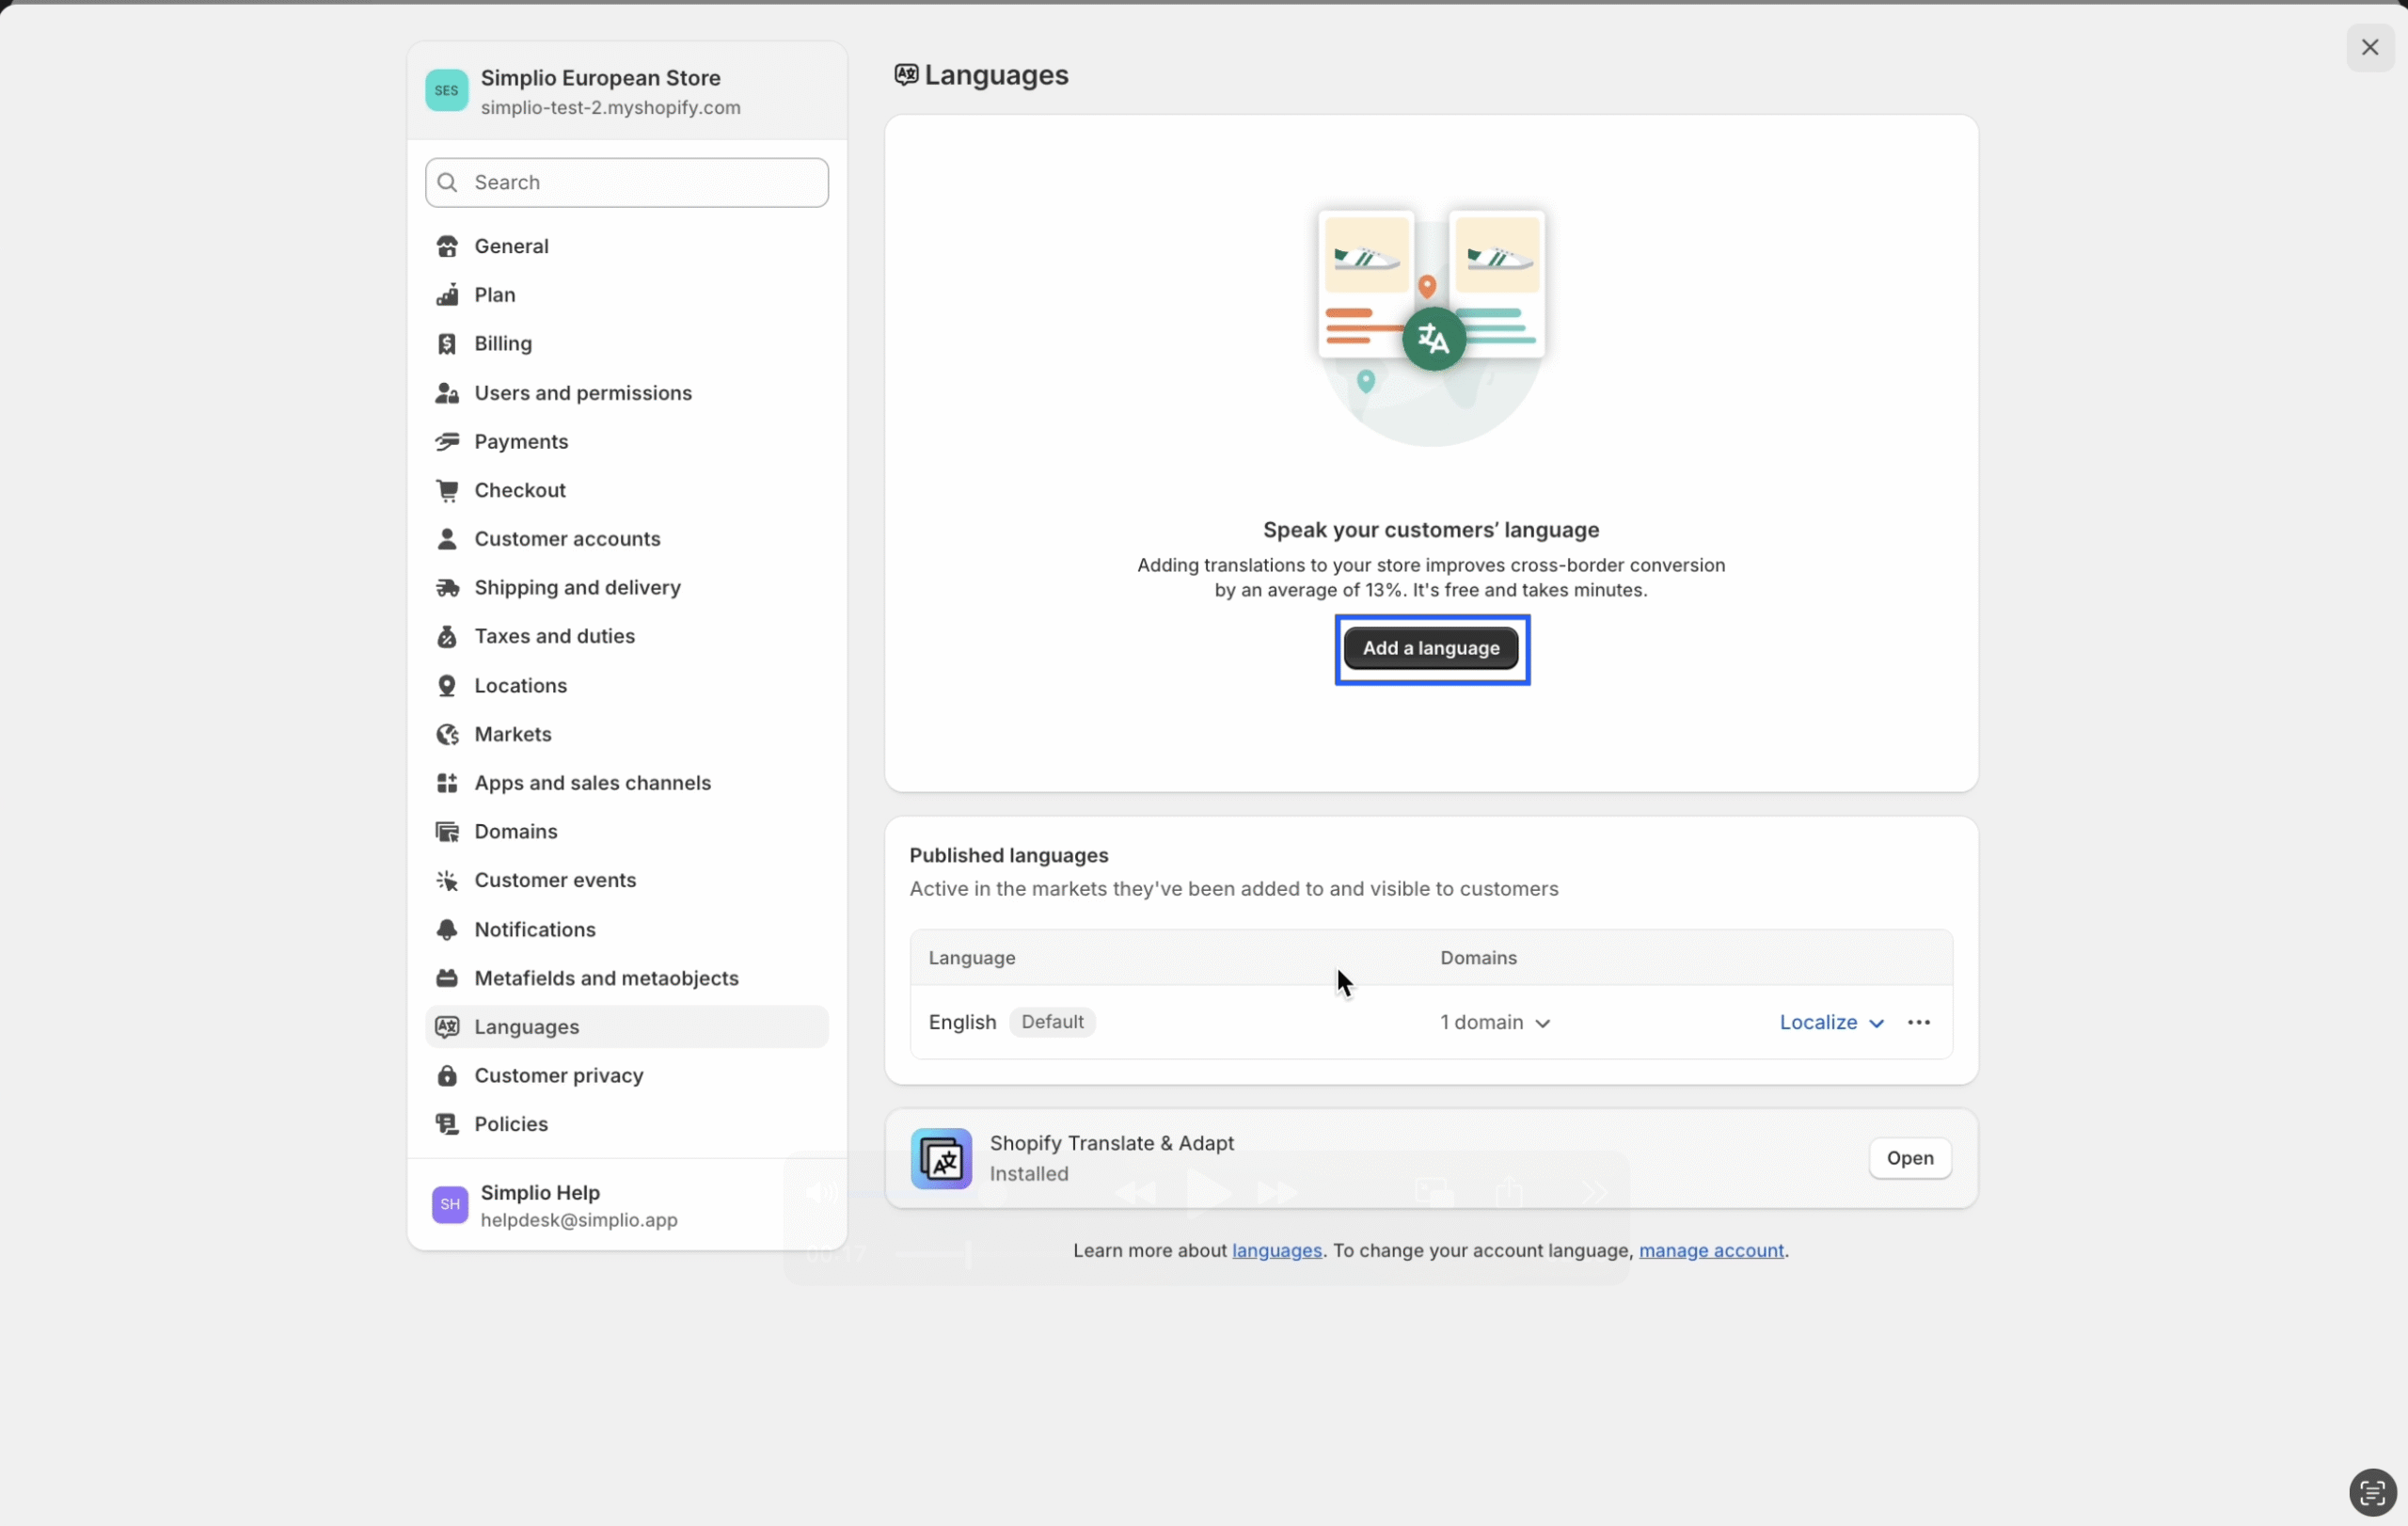
Step 2– Click on the Languages section, then click the Install button highlighted in the image with a square.
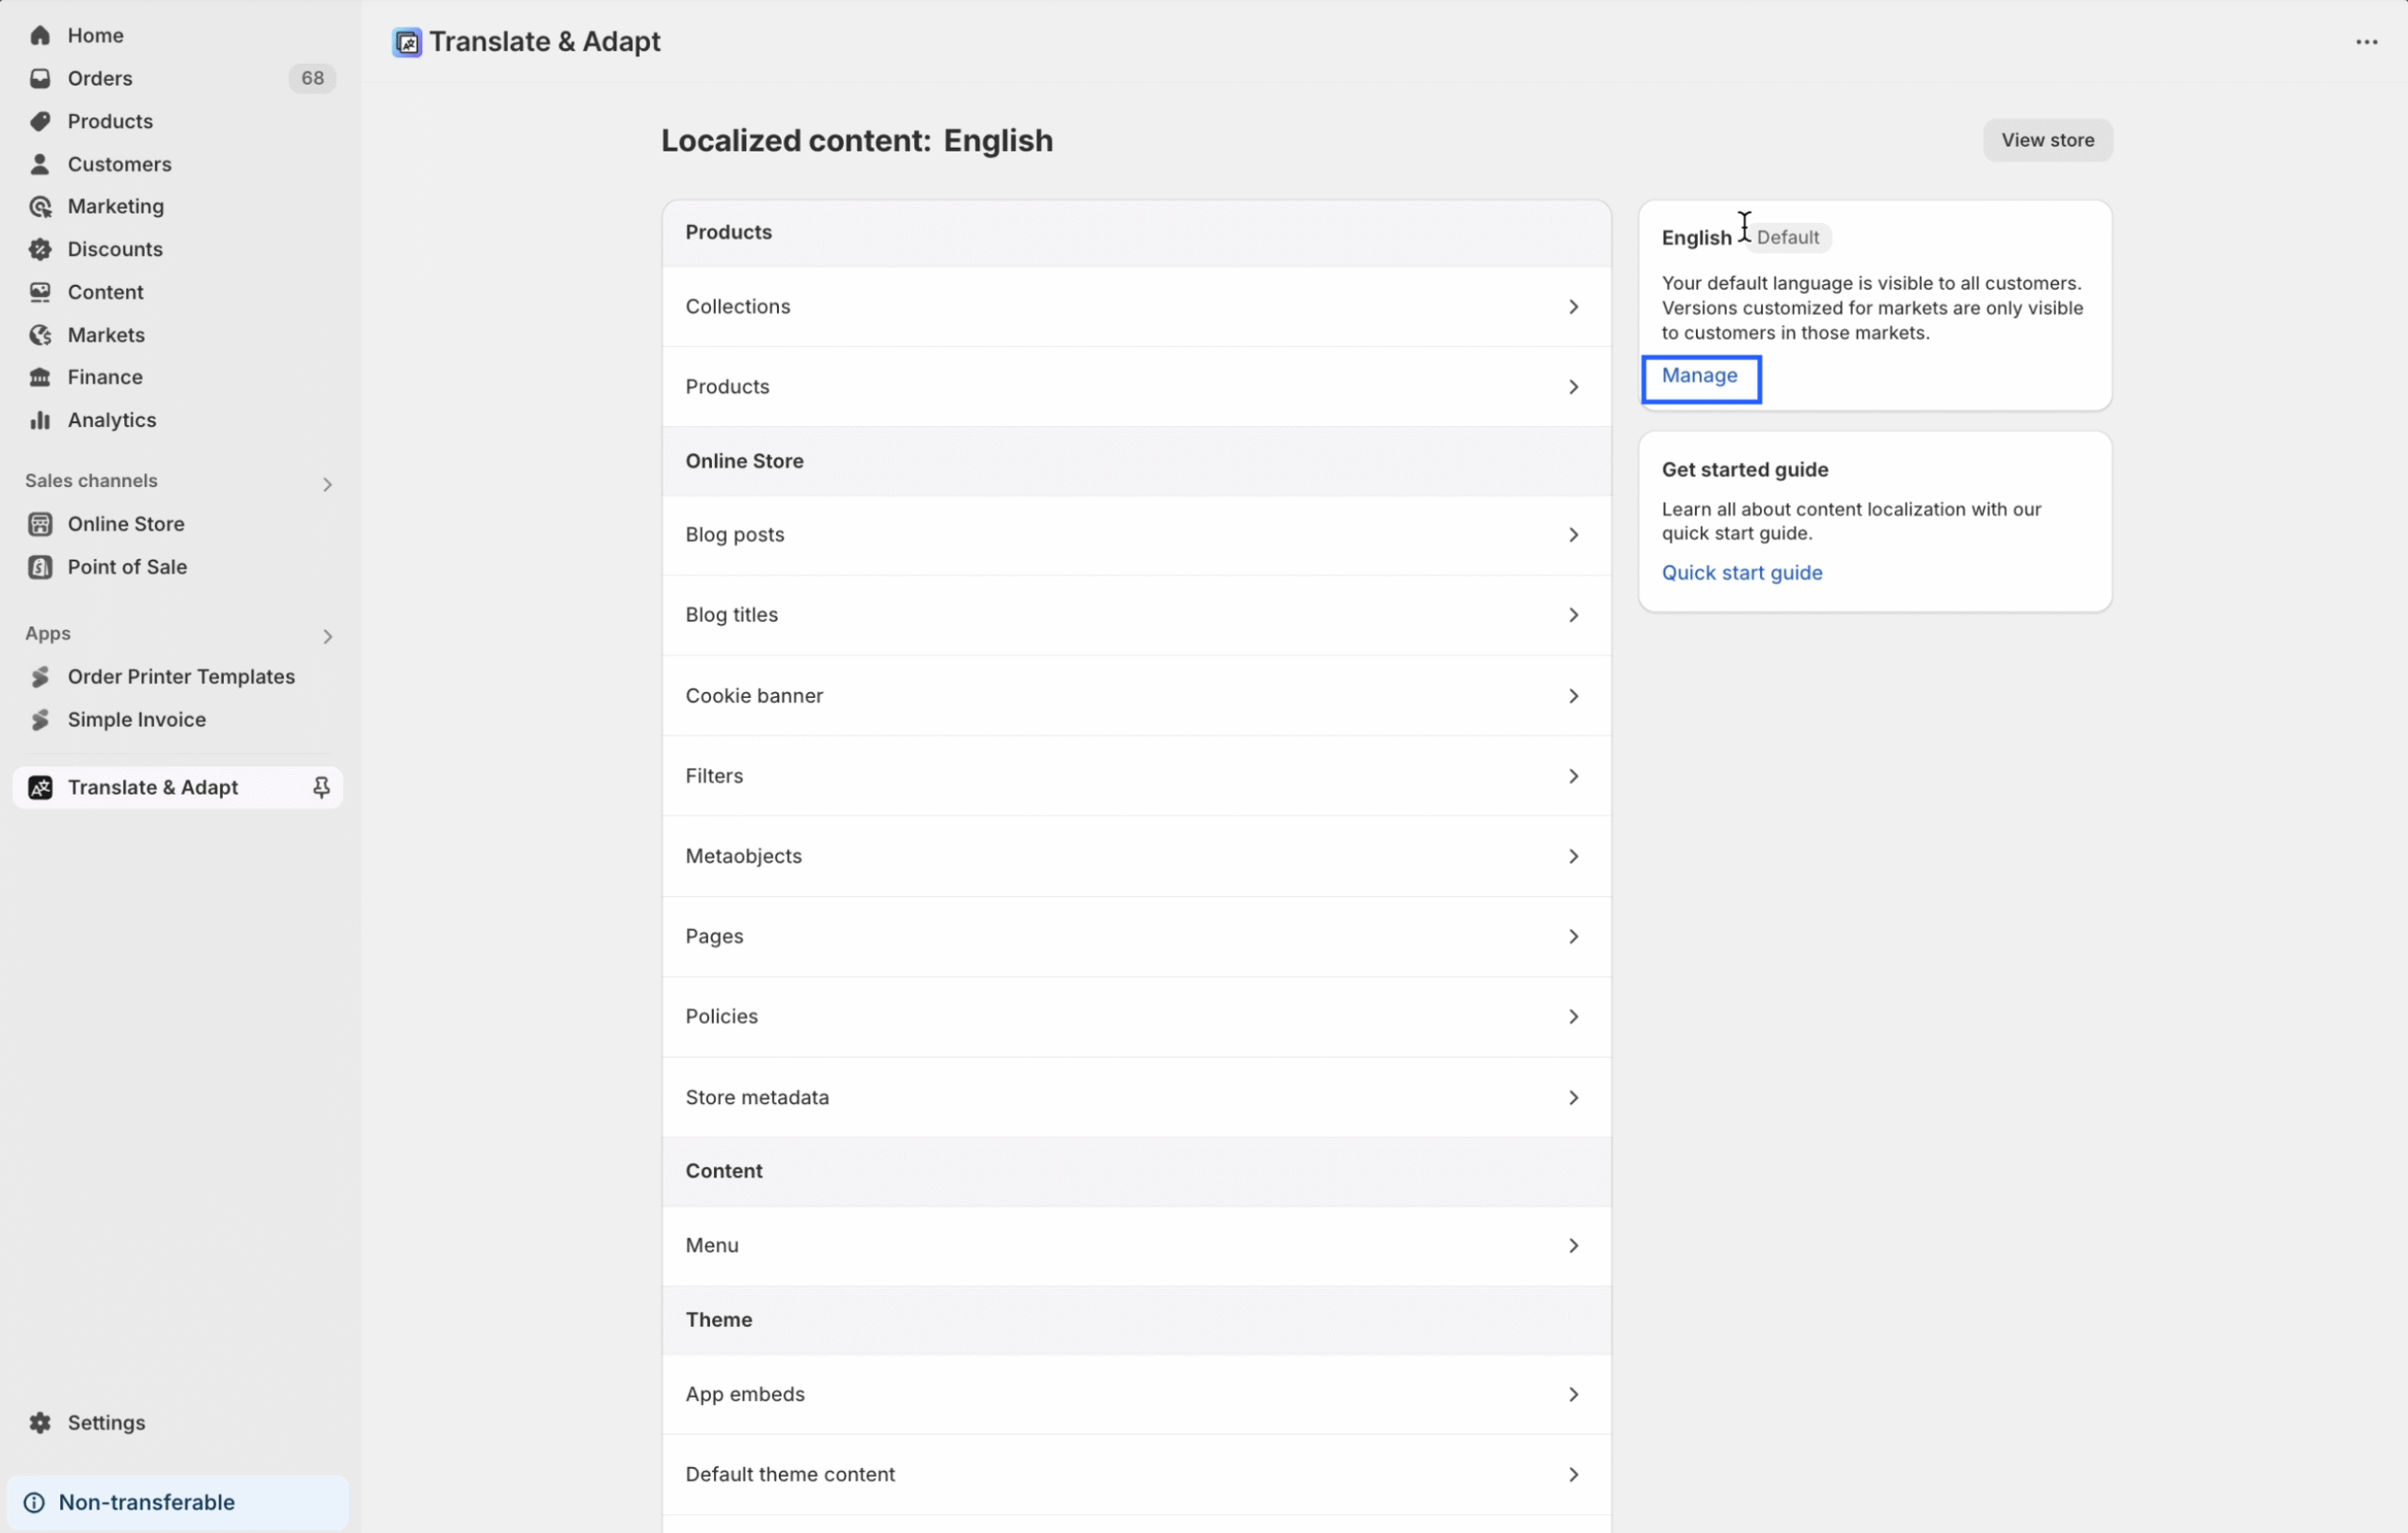
Step 3: In the Translate & Adapt app, click on the Manage option.
Step 4: Click on “Add Language” and select the language used in your store.
Step 5: After adding the language(s), under “Unpublished Languages,” click the three dots next to the language(s) and select Publish.
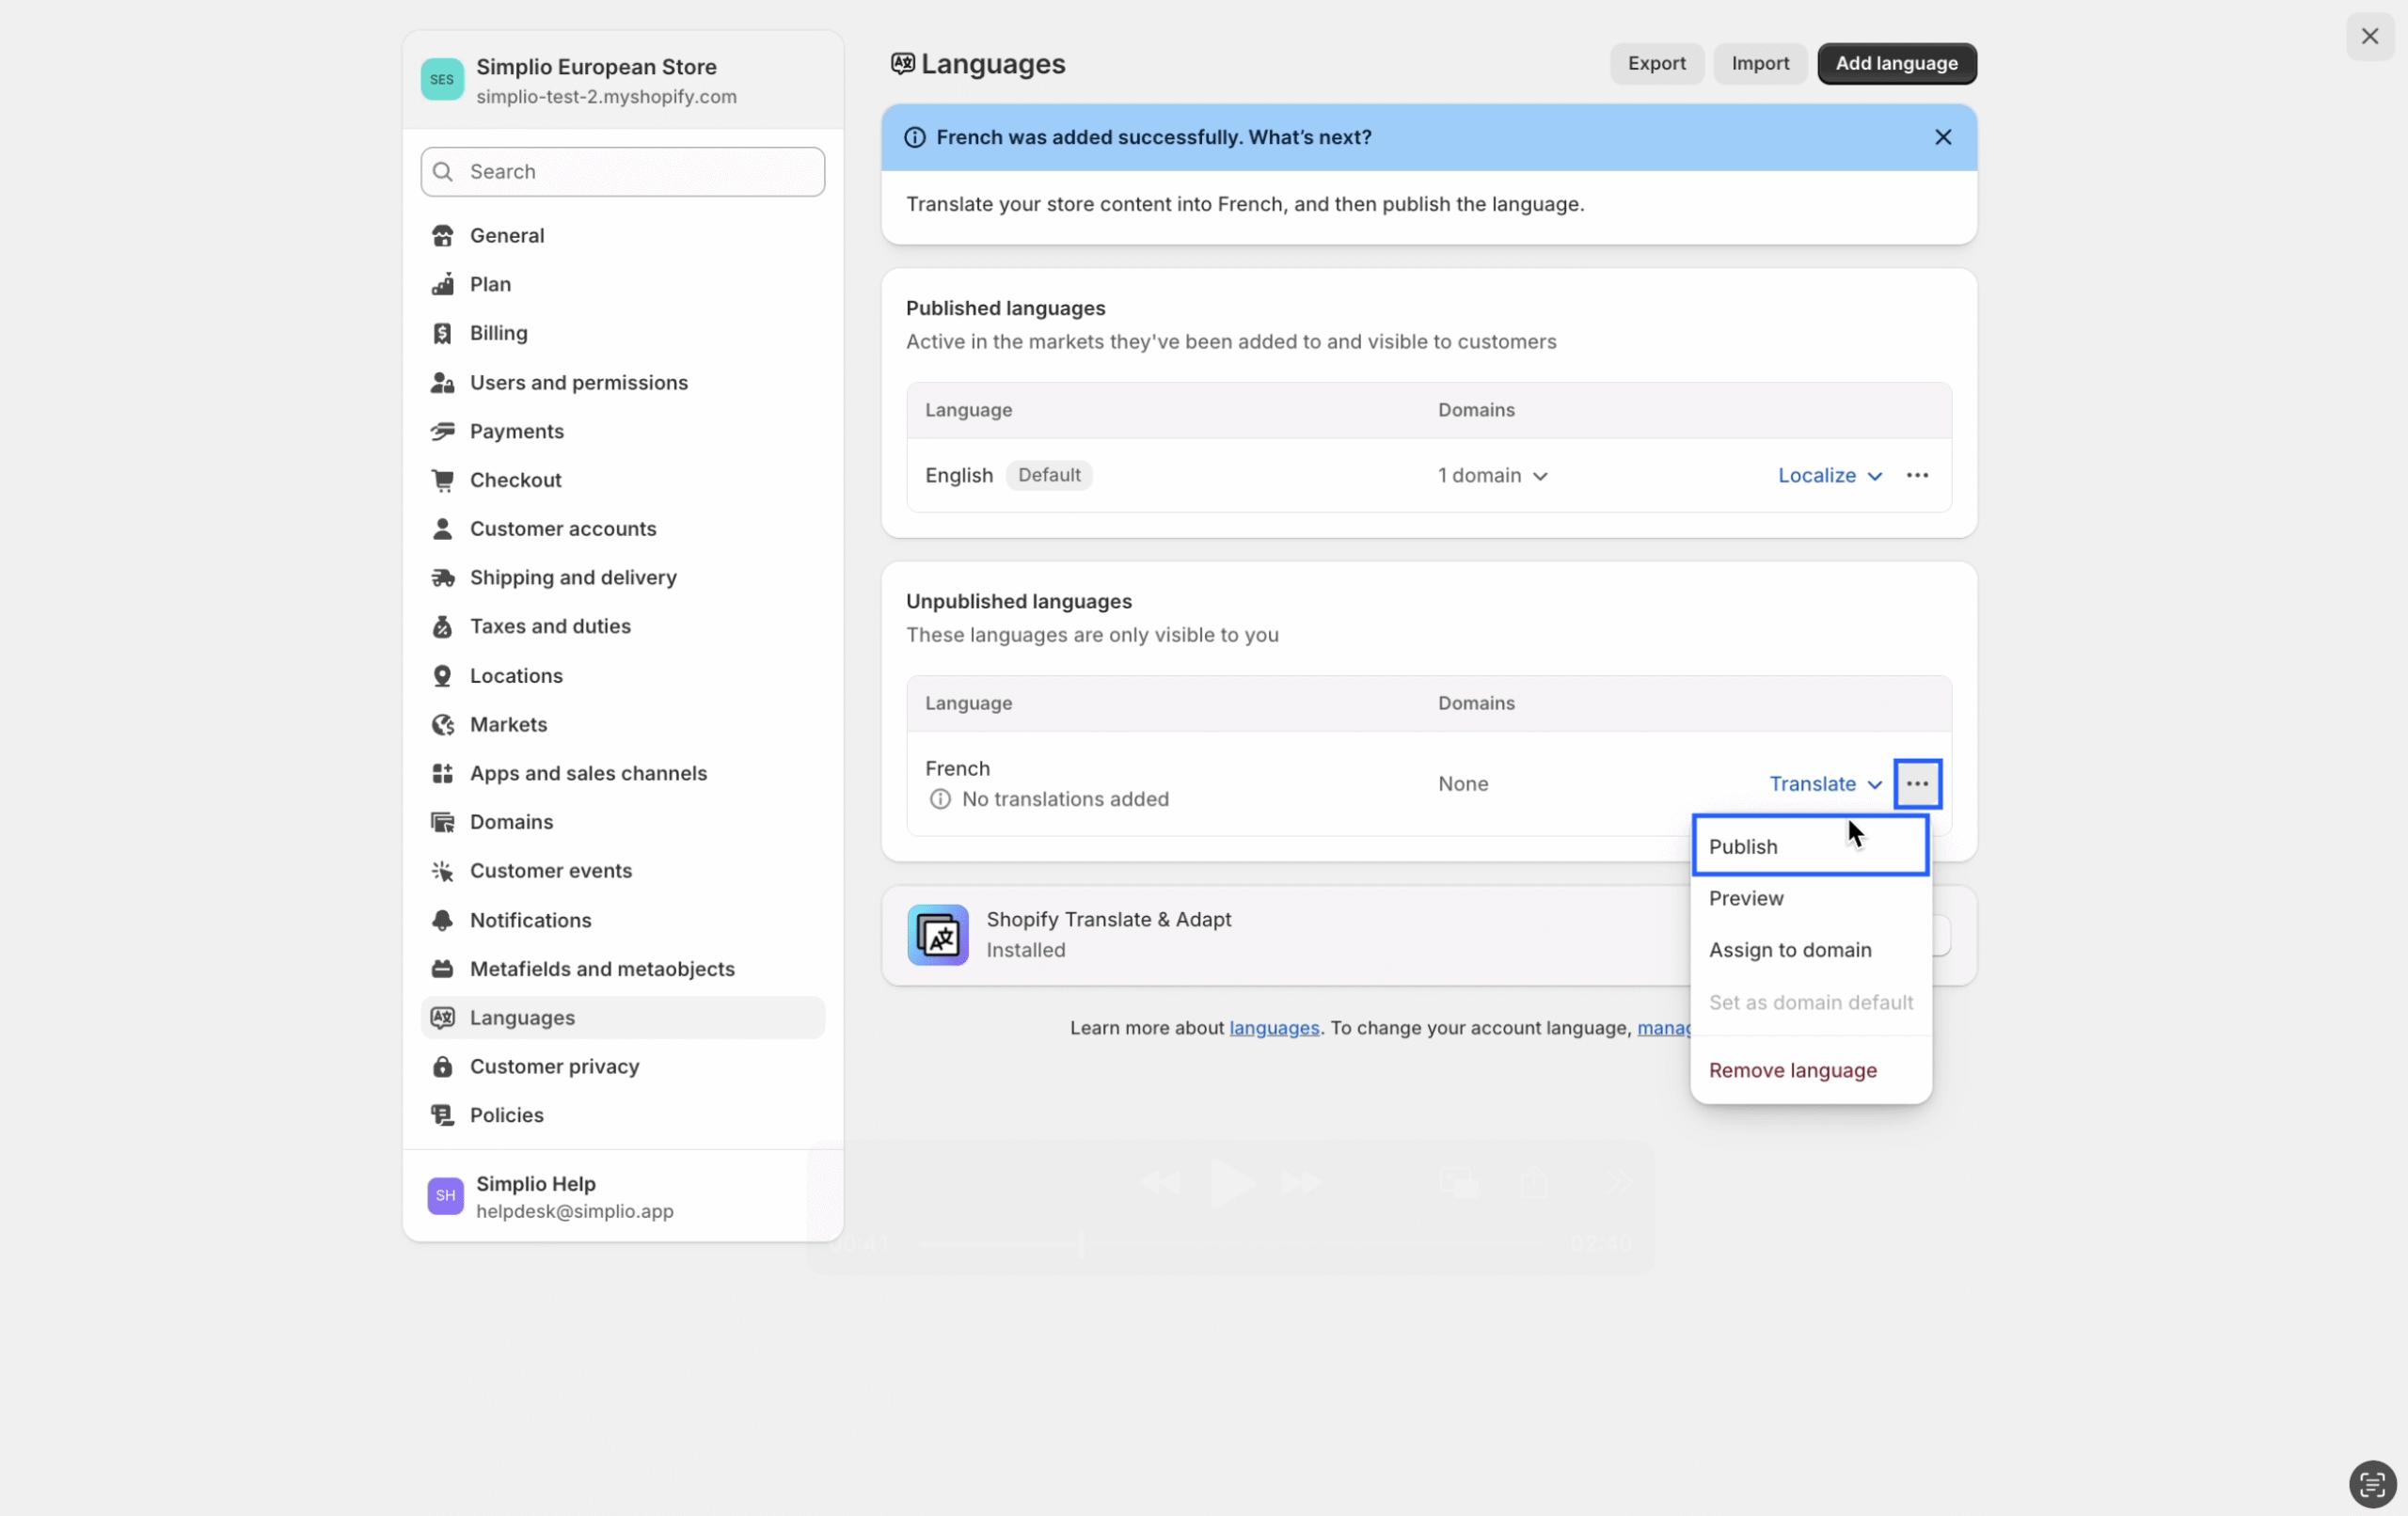
Step 6: Click the “Open” button to reopen the “Translate & Adapt” app.
![]()
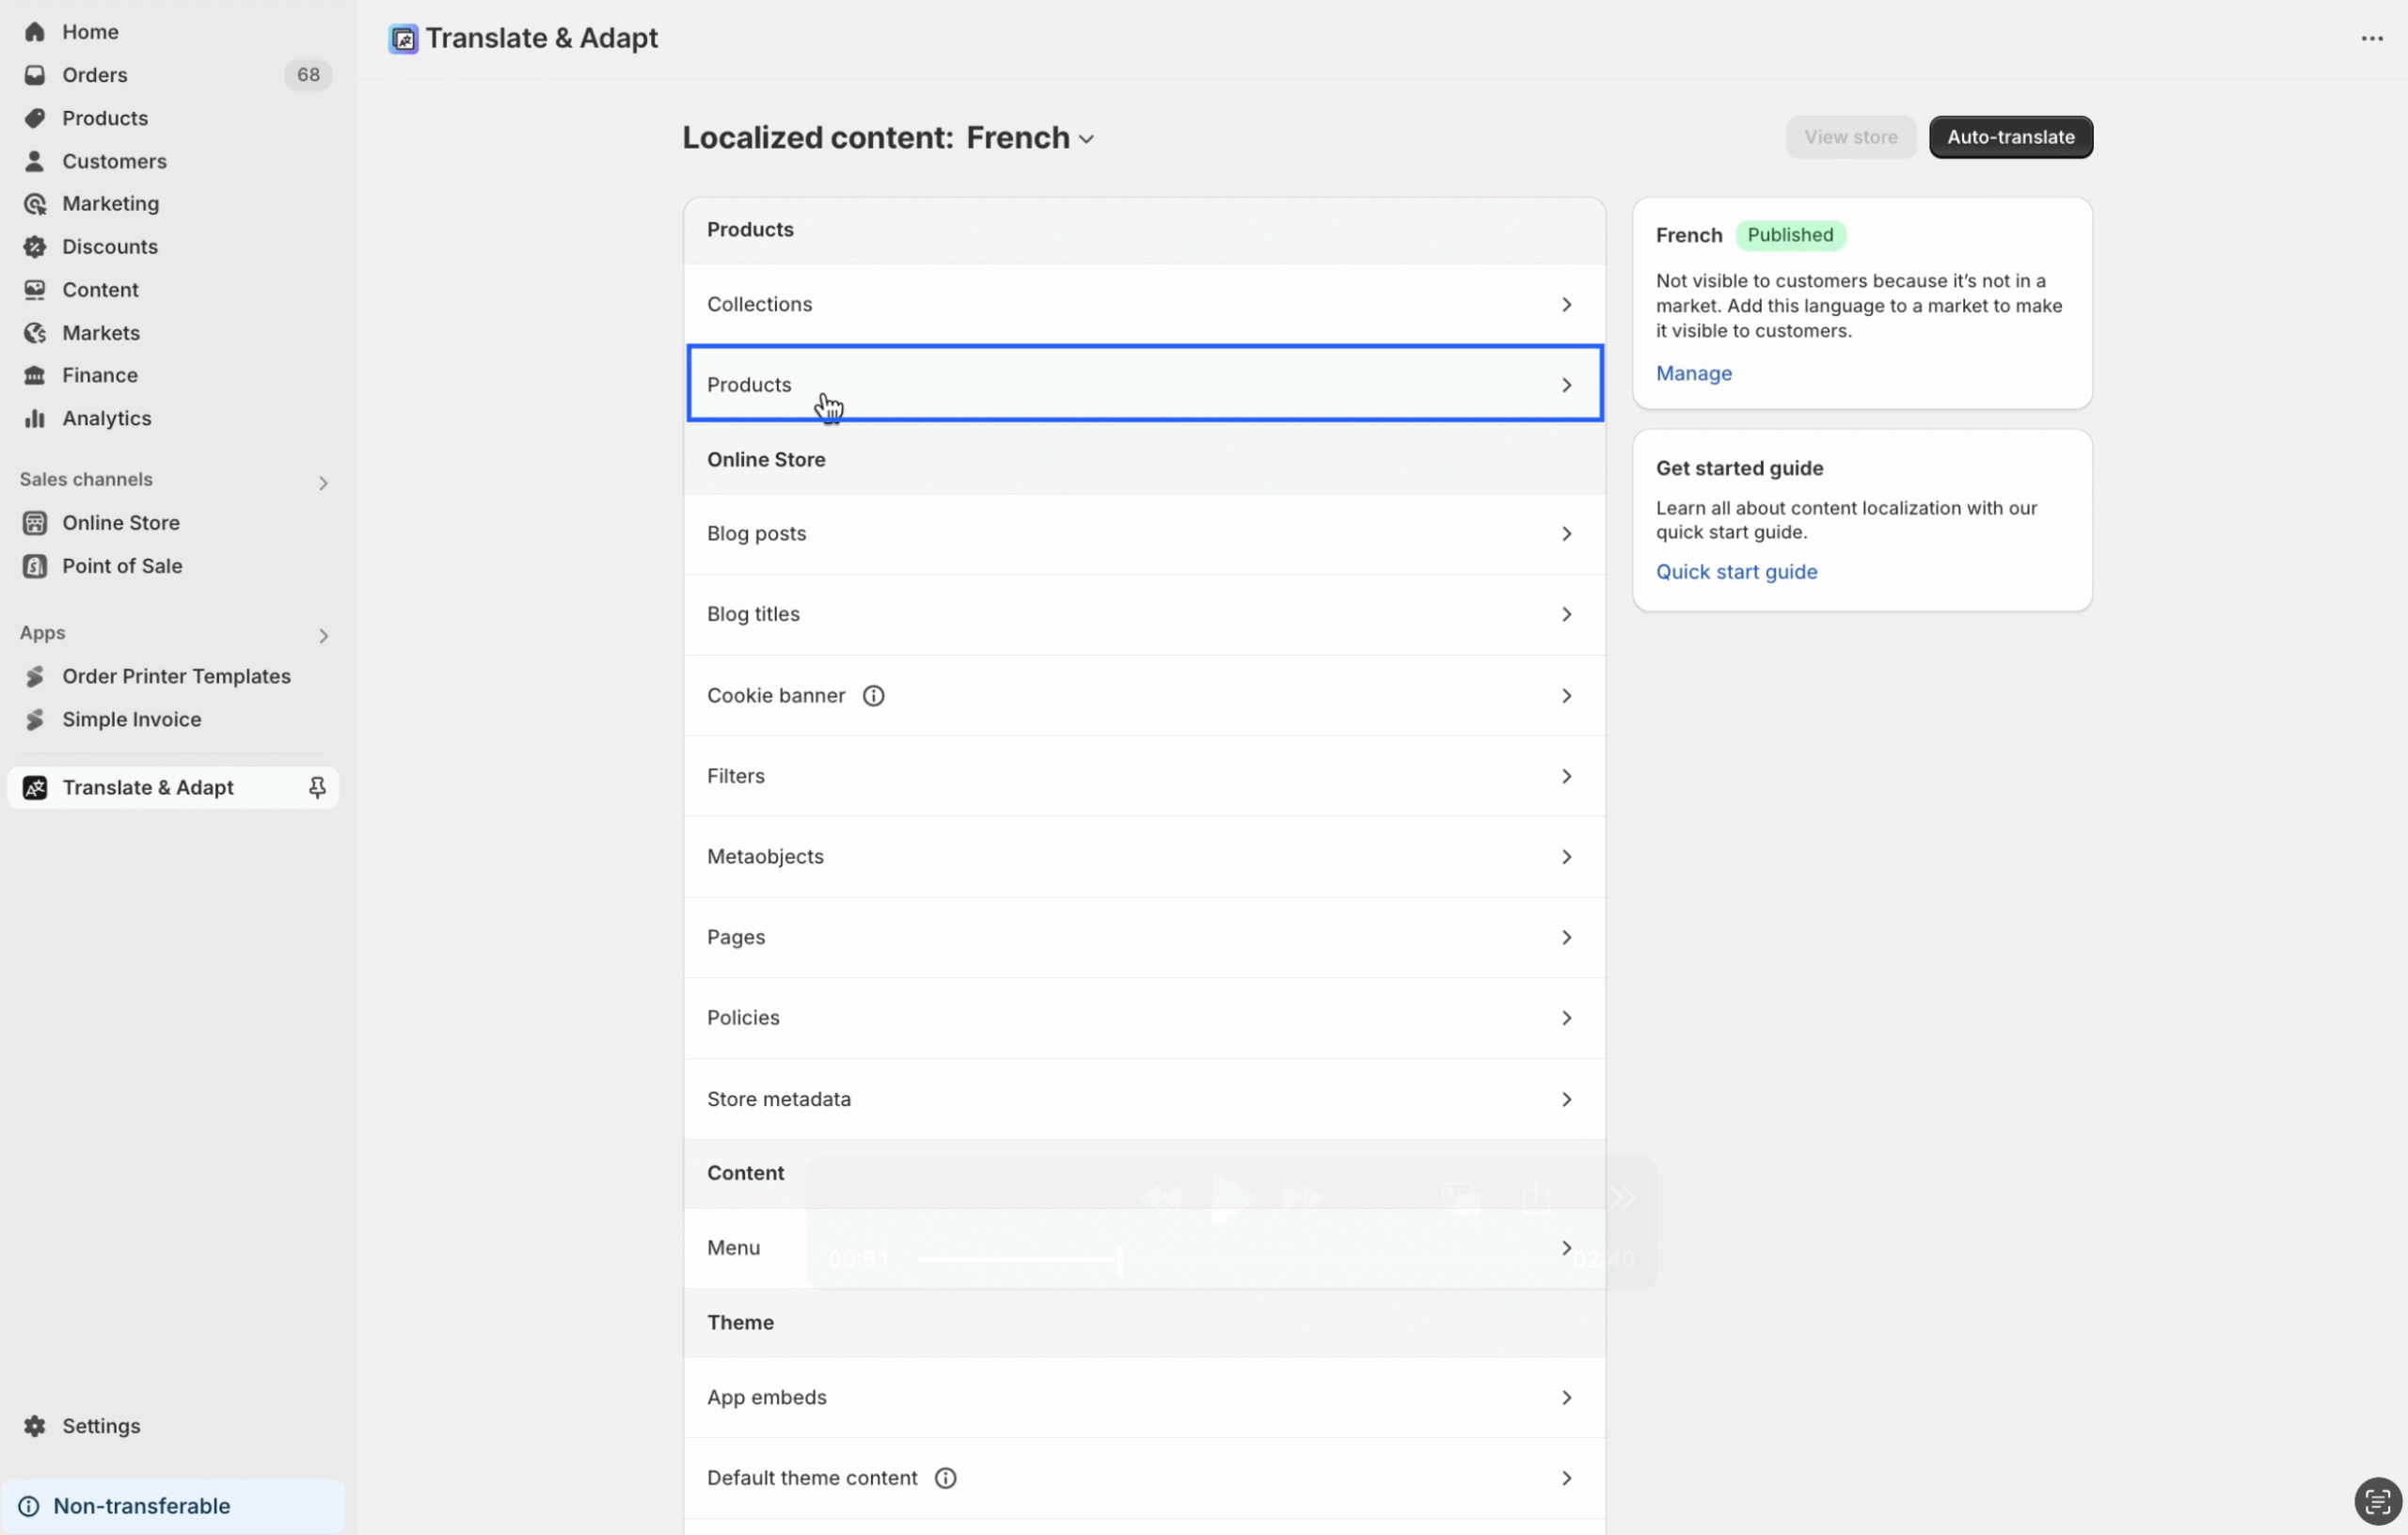
Step 7: Select the Products option.
Step 8: From the top-center dropdown box, choose the target language(s) you want to translate your product into from the default language. You can either click “Auto-translate” to let the app handle the translation automatically, or manually enter the translated product details in the target language. Once done, click “Save.”
![]()
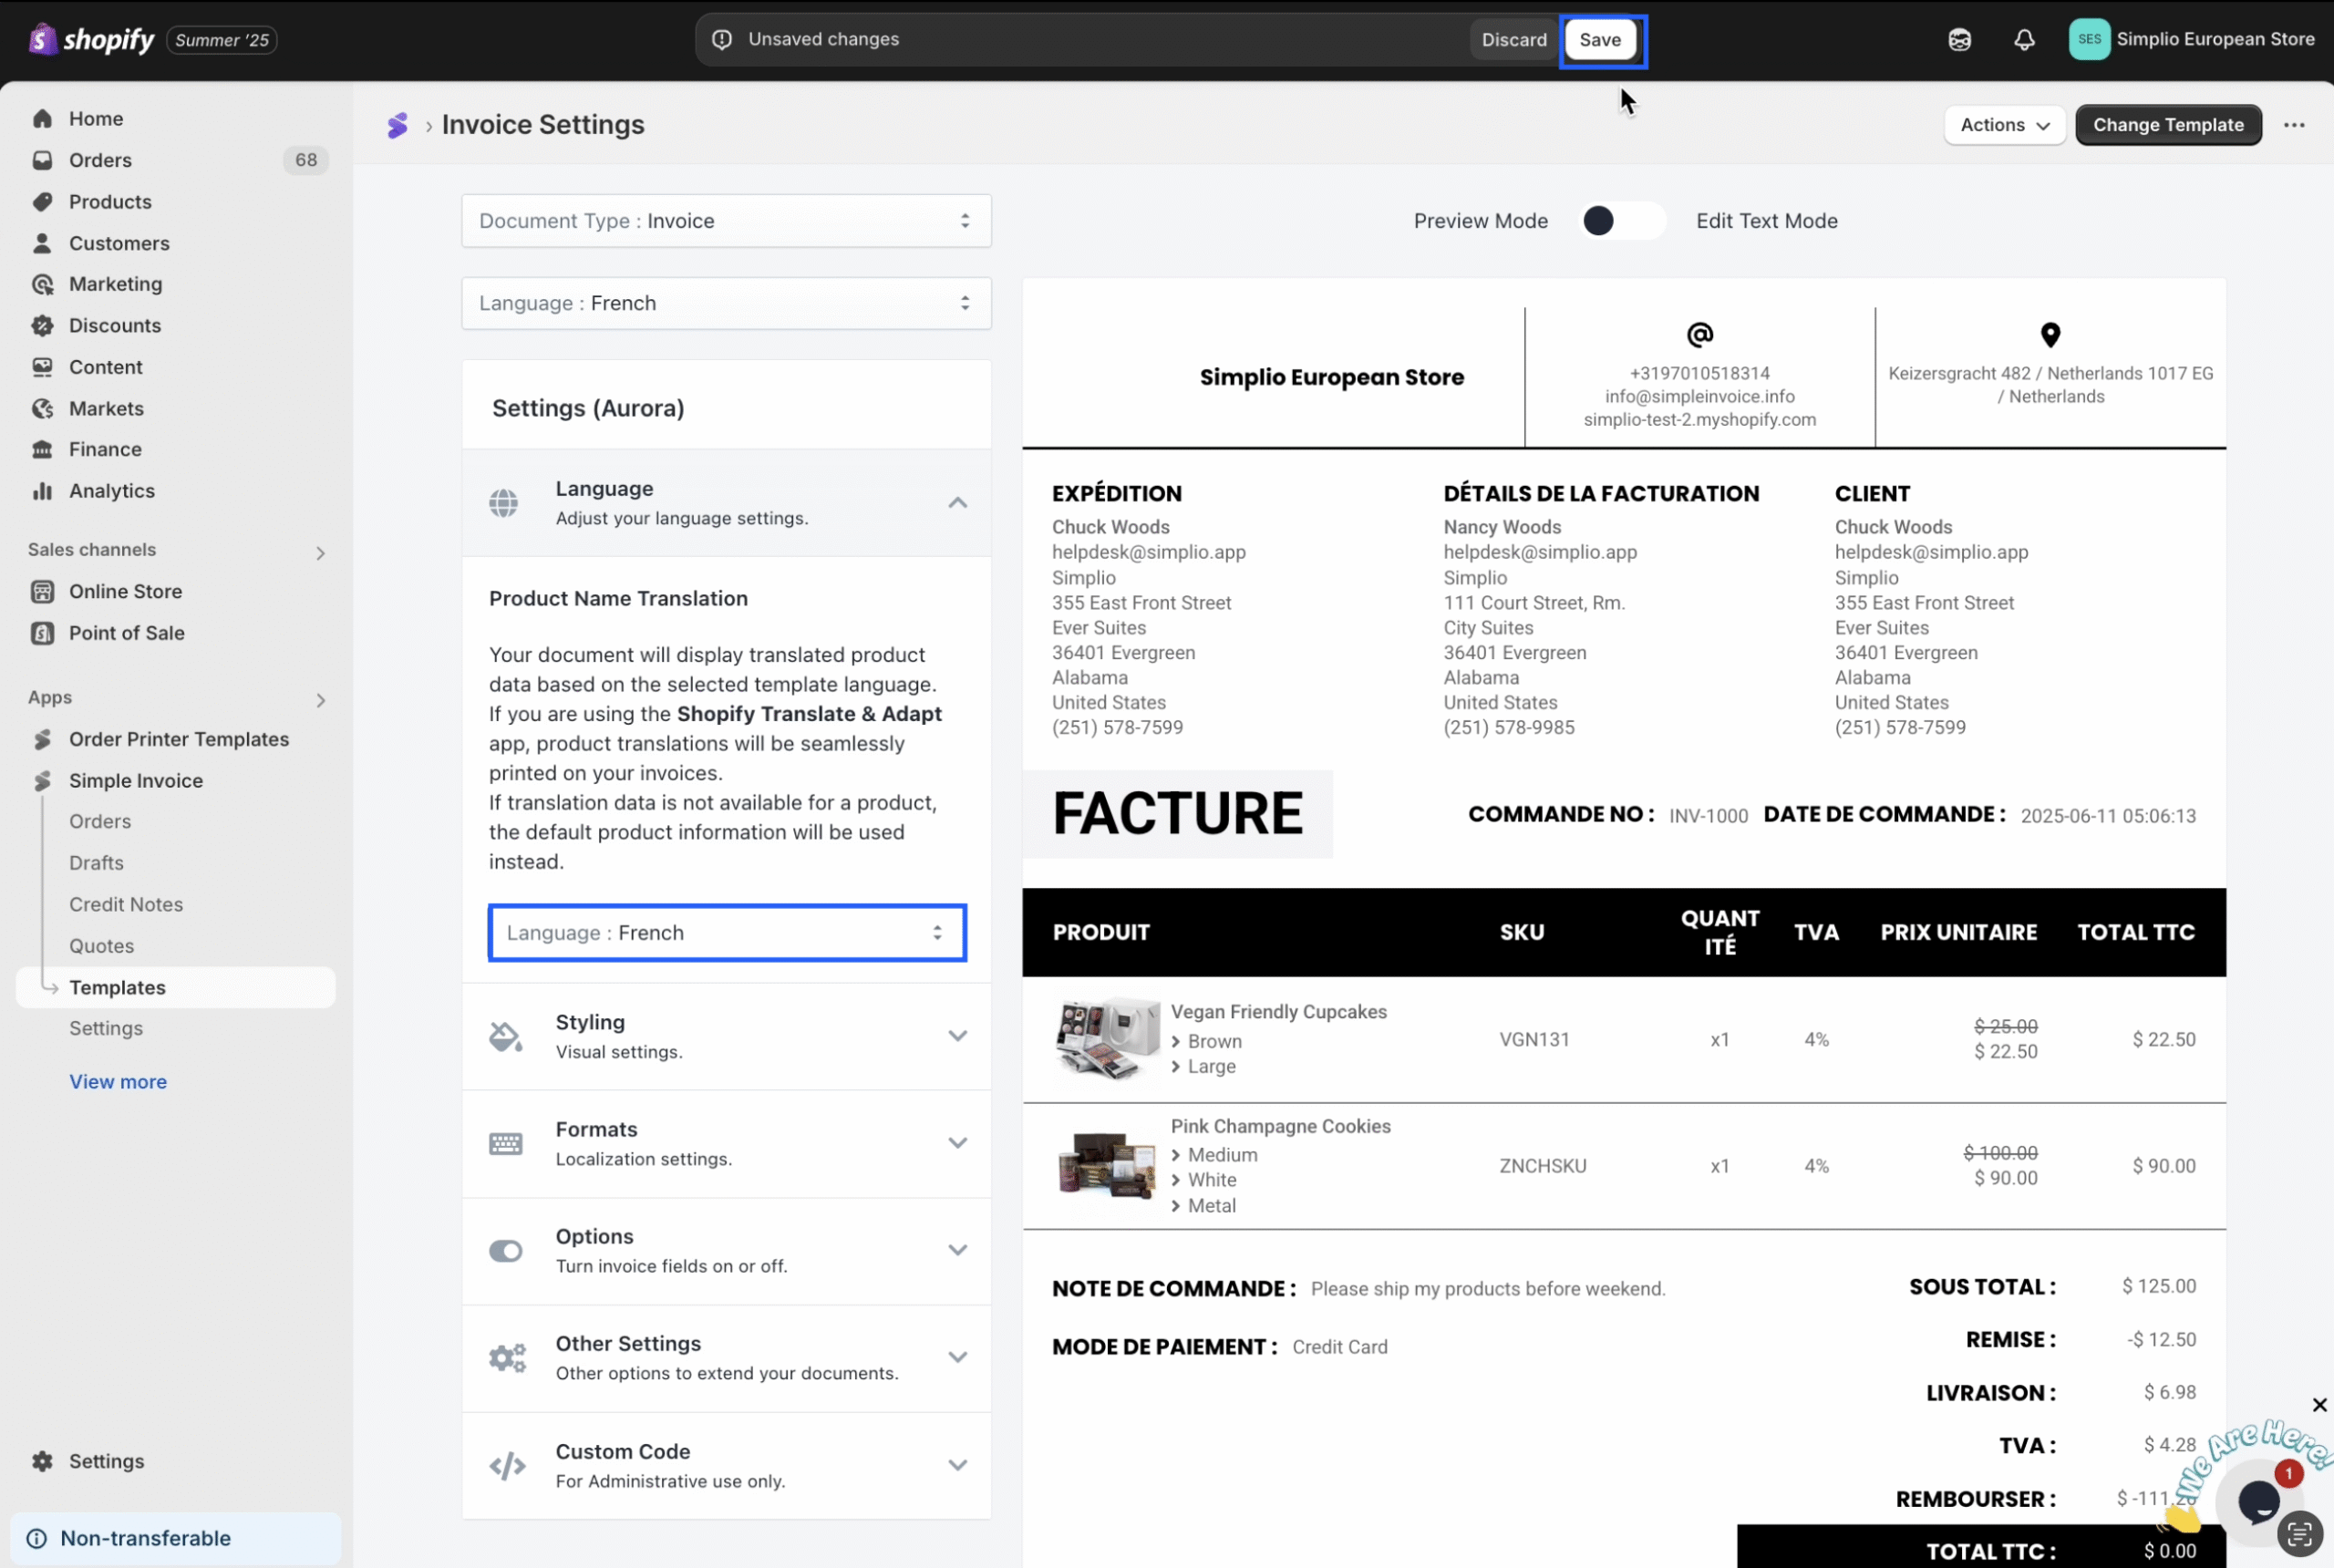
Step 9: Go to your template within our app and select the language you used for the product translation from the Document Language dropdown. Then, from the Language section in the left-side menu, click the Click Here link to update the app and follow the steps provided.
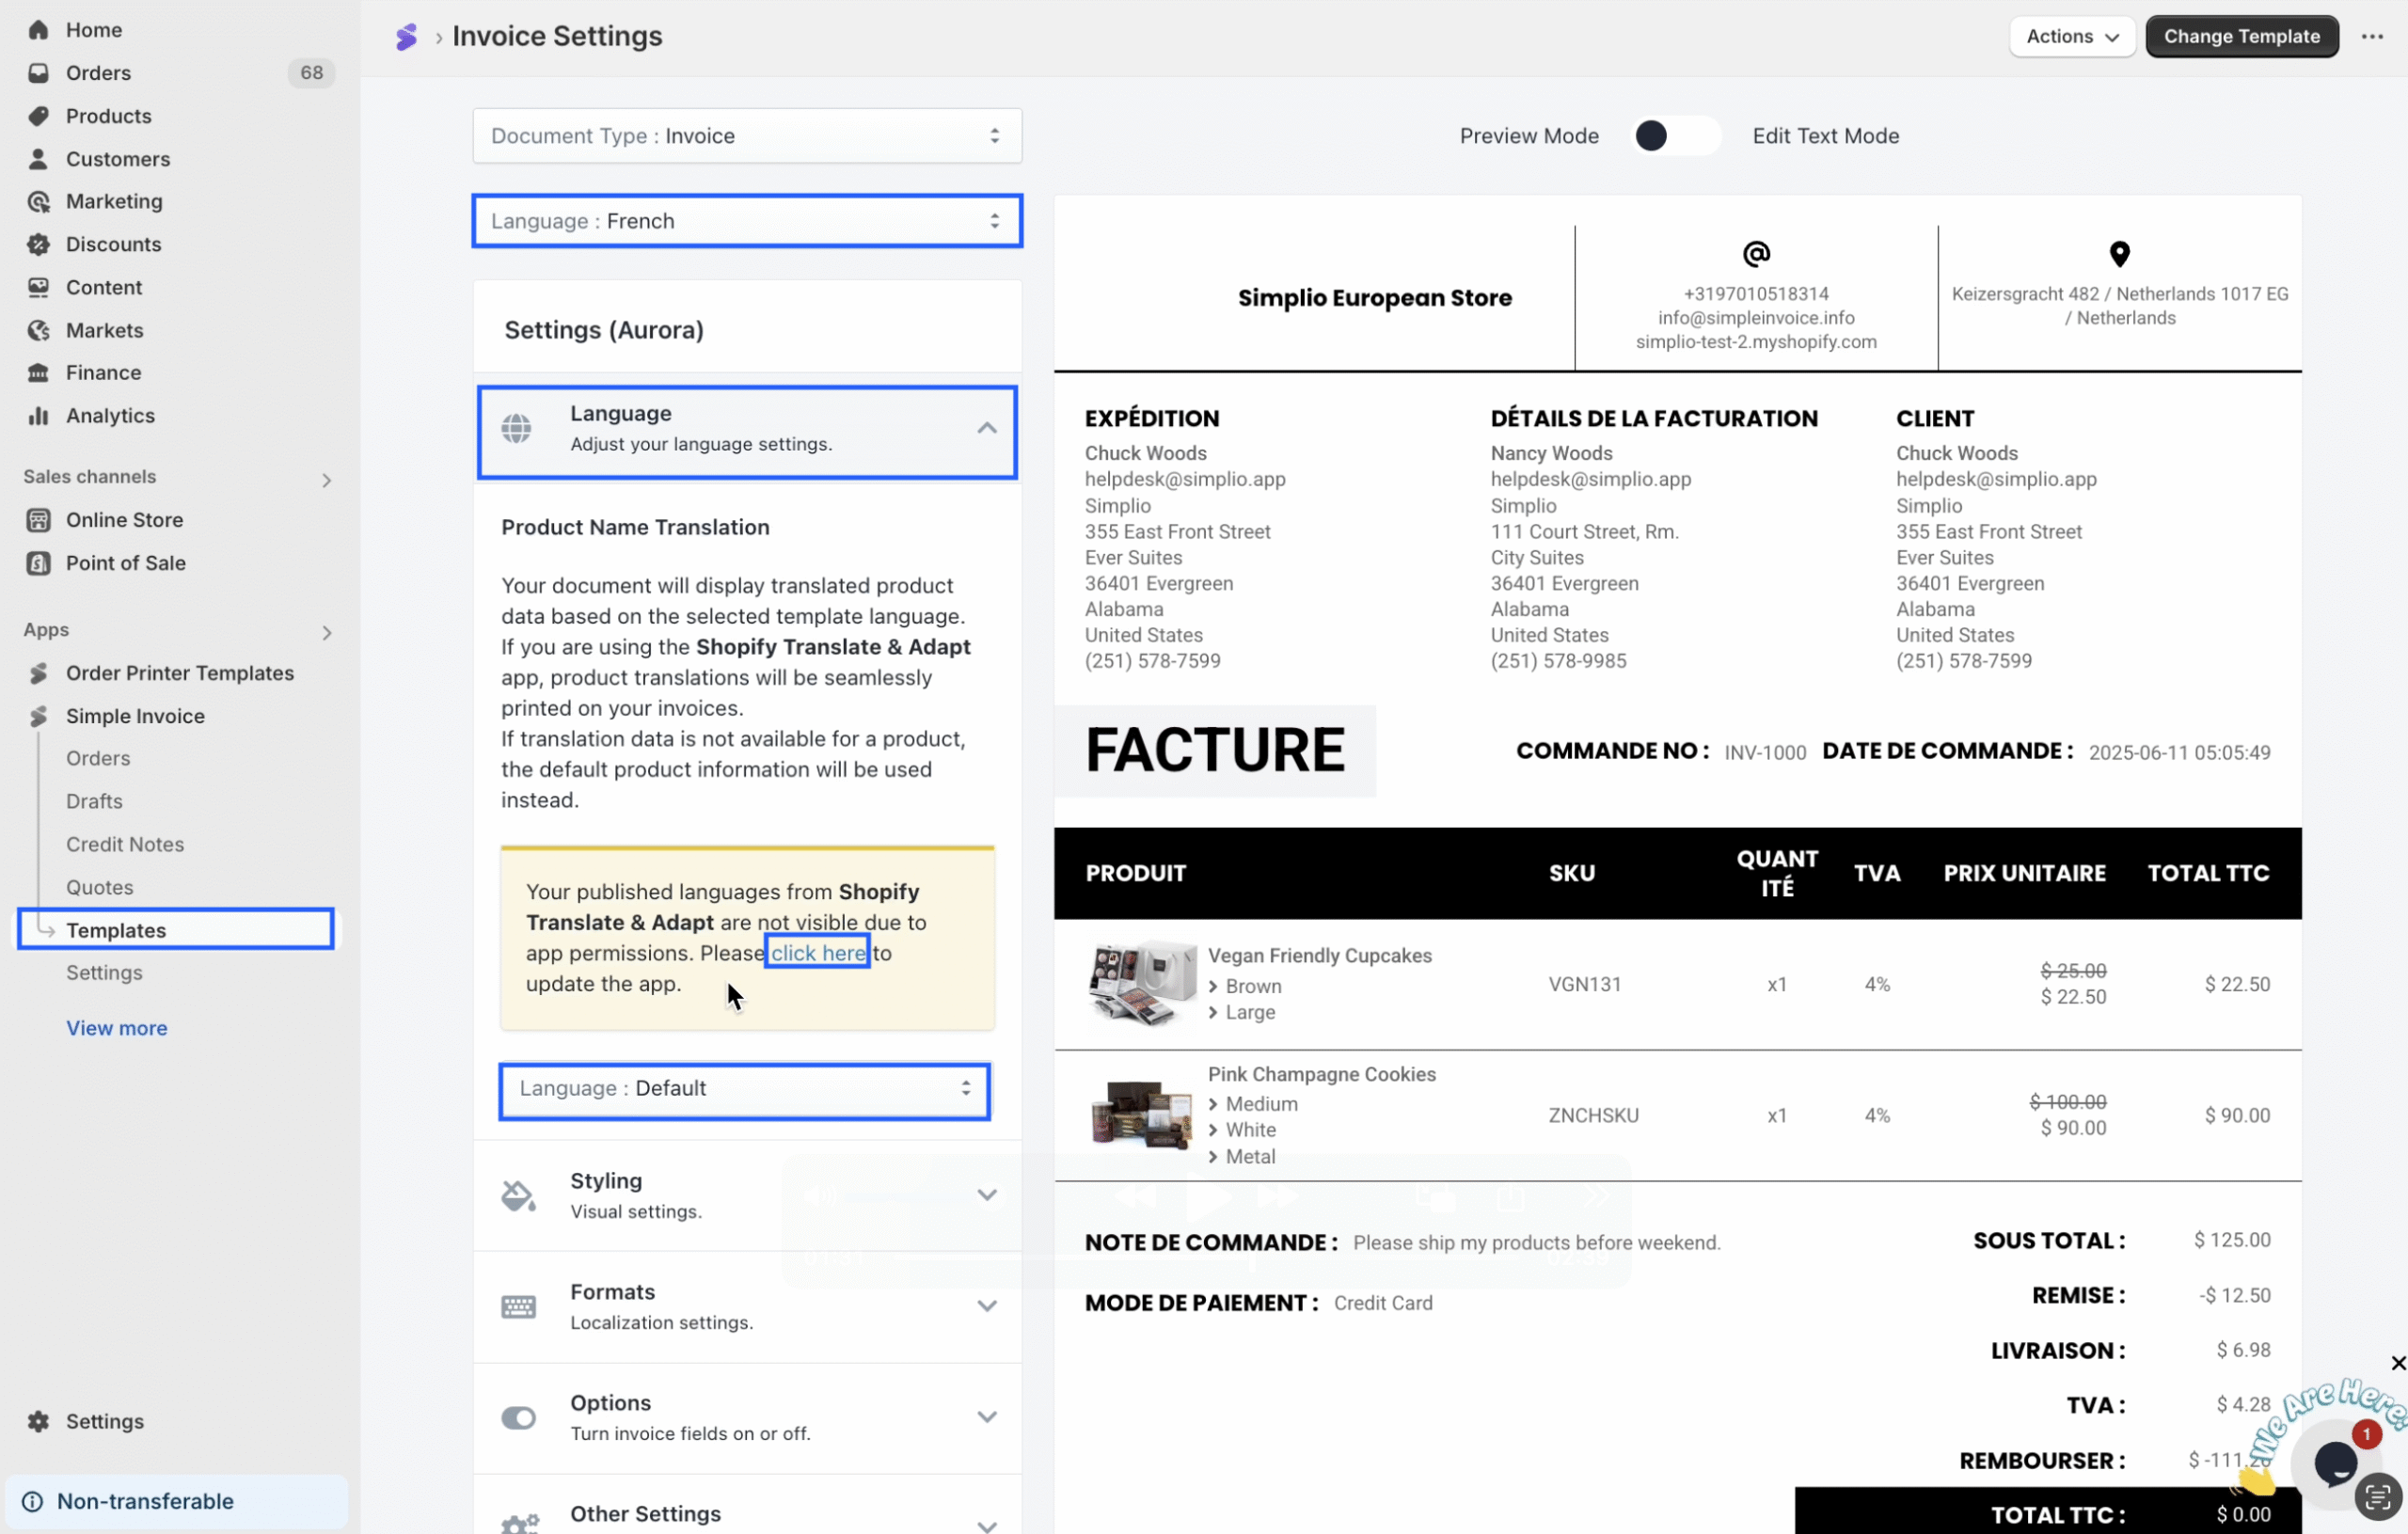
If you do not receive such a notice, you may proceed with the next step of the process.
Step 10: Under Product Name Translation, select the language you used for the product translation and click the Save button. From now on, your product names and details will appear in the translated version you provided.
The product translation feature can be utilized for all languages supported by our application.